Nourishing Green Soup

It’s currently the middle of winter and I’m noticing the effects of less sun and movement in my physical and mental health. My body is craving comfort and nourishment. Soup is one of my favorite easy comfort dishes to make – and it can be an incredibly healthy super food as well! This soup is all of those things: Comforting, fast, simple, healing, nourishing, delicious – and packed with lots of greens, vegetables, and protein rich broth.

I wanted to make a small batch (which is something I find nearly impossible to do) – so this is my little recipe for Green Soup For Two. The ingredient amounts might sound a little funny, I’m just describing what I used as I started cooking tonight. It turned out pretty darn great if I do say so myself. This would be amazing served with some crusty bread slathered in butter (which I did not have).
This soup is gluten free and can be dairy free (if an alternative oil is used in place of the butter). It also falls into the “S” category for anyone following THM. It can ALSO easily be made vegetarian or vegan by using an alternative broth option! Super easy to tweak to whatever you require.

Nourishing Green Soup

  • Servings: 2
  • Difficulty: easy
  • Print

Ingredients

  • 2 Tbsp. Butter (or alternative fat/oil)
  • Half a Leek, including the green part
  • 3 Cloves Garlic
  • 1 Zucchini
  • 1 stalk of Celery
  • Greens from 2 Kale leaves
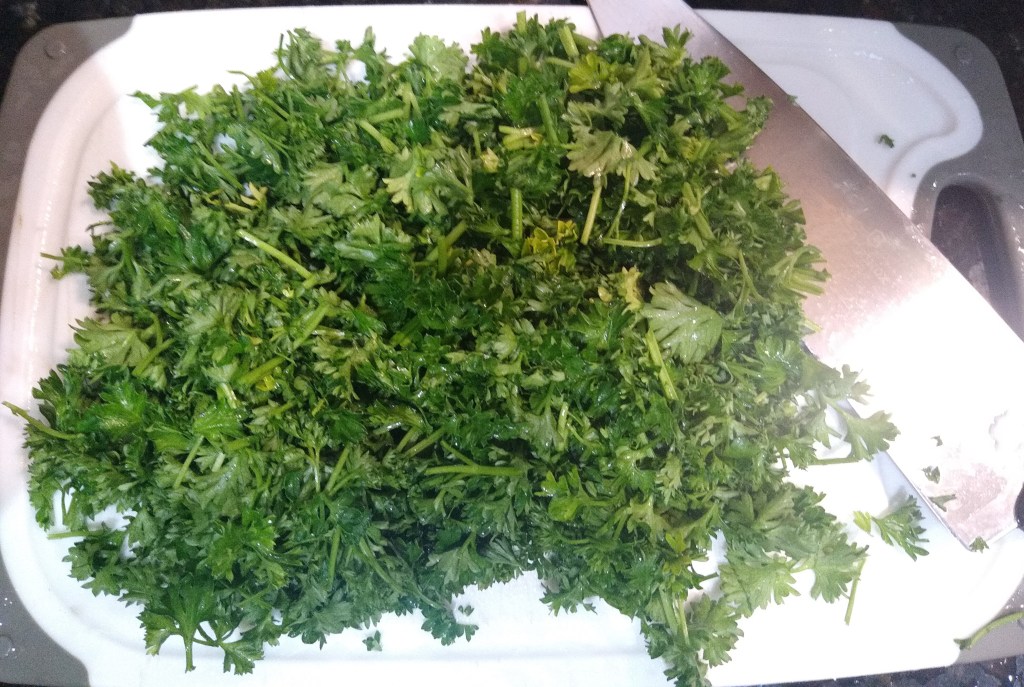
  • Large handful of Parsley
  • 2-3 cups chicken bone broth (or chicken or veggie broth)
  • 1/2 Lemon
  • Salt and Pepper to taste

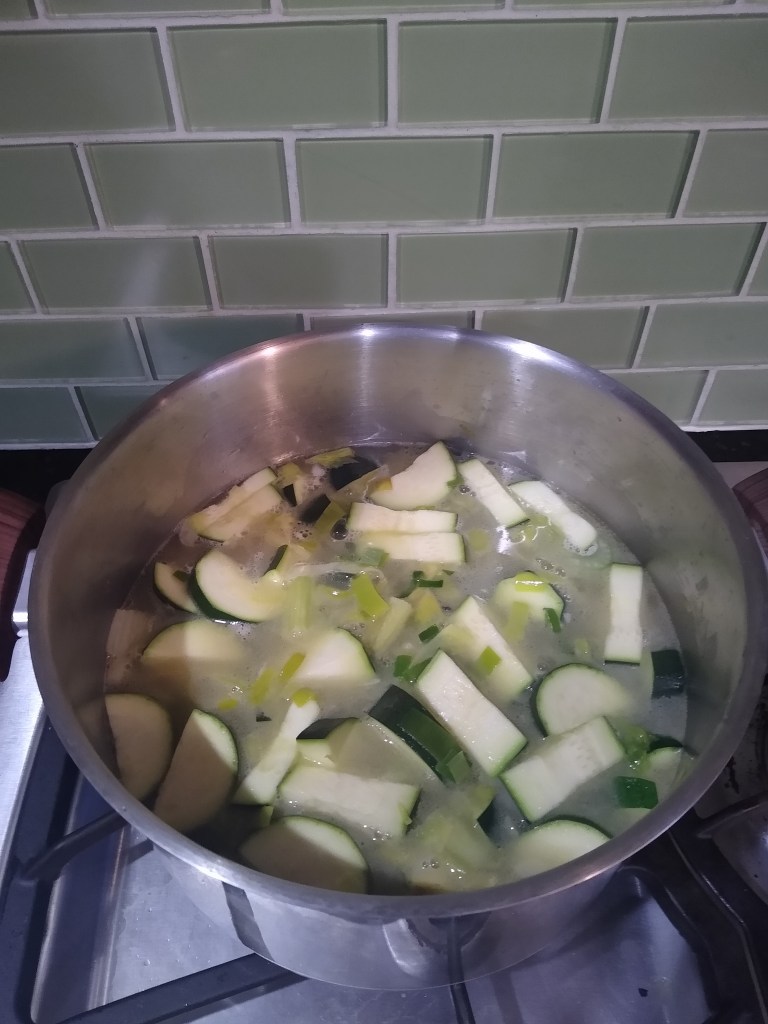
Coarsely chop all of the ingredients (chop kale and parsley more finely). Melt butter in a medium stock pan. Sauté the leek until it is beginning to brown slightly, add the garlic and continue sautéing. Add the bone broth, celery, and zucchini and cook until tender. Add the kale and parsley and cook for a few minutes until tender but still bright green. Use an immersion blender to blend soup until mostly smooth. You may end up with little bits of greens that do not blend all the way. That is ok as long as the larger pieces are smooth. Squeeze half a lemon and season to taste with salt and pepper. Serve hot and enjoy!

Please let me know if you try this recipe! What do you think?

Hawaiian Yellowfin Poke

Oooooh man… If you ever get your hands on some really good fresh tuna, don’t be afraid – eat it raw! Sushi, Sashimi, Poke – three delicious ways to eat raw fish. Dan and I made our own awesome version of Hawaiian Poke – super easy and no cooking (wink wink) involved.

If you get fresh tuna and absolutely have to cook it, please try to keep it on the rare/medium rare side of done. Overcooked tuna is a sad thing.

Capture

However, if you think you’re up for it – go the raw route!  Poke can be served with rice, salad, cucumbers, sprouts, or anything else you come up with. We ate ours with additional dipping sauces (soy sauce, vinegar, sesame oil/hot sauce), pickled ginger, bean sprouts, and wasabi paste. (We, of course, used Black Market Hot Sauce for this recipe – Chili Garlic Lime to be precise.)

There are so many different recipes for poke – look at a few and come up with your own combination!

Capture1

This recipe would be a S if you follow the Trim Healthy Mama plan.

Hawaiian Yellowfin Poke

  • Servings: 2-4
  • Difficulty: easy
  • Print
Ingredients

  • 1 lb sashimi grade tuna
  • 2-4 green onions – thinly sliced
  • 1/3 bunch cilantro – chopped
  • 1/8-1/4 c toasted sesame oil (sesame oil can be over powering so start with the smaller amount and ad more if desired)
  • 1/4 c dark soy sauce
  • 1/4 c apple cider vinegar
  • 1 T grated fresh ginger
  • 2-3 T hot sauce
  • 2 T sesame seeds

Instructions

  1. With a sharp knife, dice tuna into 1/4 inch cubes.
  2. In a medium bowl, whisk together sesame oil, soy sauce, vinegar, ginger, and hot sauce. Taste and adjust flavors to your preference.
  3. Add tuna and remaining ingredients to marinade.
  4. Cover and let marinade in refrigerator until ready to serve. (Can also be eaten immediately.)

Enjoy!


Satisfying Salmon and Kale

At this time of year, all I want to do is hibernate and drink copious amounts of creamy coffee. Christmas and New Years are past and the cold has officially set in here in the NW. Instead of embracing the grumpy bear persona – I should be taking brisk walks and eating delicious healthy fats and life-giving leafy greens.

Ha ha! Let’s not get too crazy now. One step at a time. Food first, walk later…maybe.

So the real question is: What’s for dinner? Answer: Baked salmon and wilted kale!                 Stay with me. It tastes better than it sounds.          Bake some salmon. Rip up some greens and add a little flavor. Enjoy! It really is that easy.

Wild salmon and kale are both considered super foods! Together they are full of iron, calcium, Omega-3 and Omega-6 fats, and vitamins D, B12, B6, B3, K, A, and C. I’m not even mentioning all of the other crazy nutrients salmon and kale contain.

I love salmon because it is just so satisfying and filling. And I love kale because I’m a little weird and I like the strong, deep, green flavor it has. I also like the fact that kale doesn’t disintegrate and get slimy the way spinach does when it’s cooked for longer than a minute.

20151231_175230This dish is so simple it doesn’t really need a recipe, but I’ll give you one anyway. This is a perfect deep S meal if you follow the Trim Healthy Mama plan.

But first, a few notes from my inner food/health nerd. Some vitamins, including A and K, are fat-soluble – meaning our bodies rely on the presence of fat to properly absorb them. Iron can only be properly absorbed when paired with vitamin C (found in vinegar), and calcium requires vitamin D (found in salmon). When you compare the nutrients found in these two super foods – you find a match made in heaven. You can find links to more detailed explanations at the bottom of the post.

Now the recipe!

Baked Salmon with Wilted Kale

  • Servings: 1+
  • Difficulty: easy
  • Print
Ingredients

  • salmon filet
  • fresh kale – 1-2 large leaves per person
  • salted butter
  • vinegar of choice (flavored, rice wine, apple cider, etc.)
  • toasted sesame oil
  • Braggs Aminos or soy sauce

Instructions

Preheat oven to 350. Place salmon (skin side down) in an oven safe pan and dot generously with butter. Bake for 15 minutes or until the flesh flakes apart easily with a fork. Remove from oven. While salmon is baking, prepare the kale. Begin by washing thoroughly and shaking off excess water. Remove the tough center core from each leaf and cut or rip remaining greens into large bit size pieces. Heat a medium-sized skillet over medium high heat and toss in kale pieces. Stir to heat evenly and continue to cook until kale is slightly wilted. A couple of tablespoons of water can be added if necessary to prevent sticking and burning. Pile wilted kale on a plate and drizzle with a few splashes each of vinegar, sesame oil and aminos. Top with a serving of salmon and enjoy!

Reference Links

The Healthiest Way to Eat Kale

Salmon Nutrients

Nutrient Absorption of Spinach (sharing because it’s similar to kale)

Do you have a favorite way to eat salmon or kale? I’d love to find some new ways to enjoy these super foods!

Dinner with the girls…

My family has scattered to the four corners of the earth. Well – more like the 2.5 corners of the earth. My brother got on a plane to Korea last week and most of my family moved to the middle of Washington on Sunday. It has been a tiring and emotional couple of weeks. I hate saying goodbye, however temporarily or short term. Thankfully two of my sisters are staying on this side of the state, and my best friend Ayla is sticking around for a little while.

One of our goals for the summer is to make dinner together once a week. It will be a challenge because we all have pretty different schedules – but we’ve already succeeded once! Last night we had the welcome addition of the youngest member of Hannah’s host family join us…

For dinner I made fresh gluten-free, corn-free pasta! Ayla actually did all of the hard work, she rolled it all out while I worked on the sauces. Gluten-free dough is much more delicate then regular dough but as long as you pay attention and work a little slower – there shouldn’t be any problems. The nice thing about it is even if it does fall apart you can just squish it back together and start over!

The recipe I used for this pasta is an adaptation of a recipe from the Gluten-Free Girl – Shauna Ahern.

Note: When working with gluten-free flours and adjusting recipes, it is important to use weight instead of volume to measure them. That is why I have the weight of each flour in this recipe. I also used only guar gum instead of a combination of guar and xanthan gum because xanthan gum is a byproduct of corn.

Homemade Gluten Free Pasta

Ingredients

  • 1.25oz amaranth flour
  • 1.25oz millet flour
  • 2.125oz potato starch
  • 2.5oz quinoa flour
  • 3 tsp guar gum
  • 1 tsp fine sea salt
  • 2 large eggs
  • 4 large egg yolks

Directions

  1. Whisk the eggs and egg yolks together in a small bowl.
  2. Combine the dry ingredients in a medium bowl, make a well in center and pour in the whisked eggs and egg yolks.
  3. Stir all ingredients together with a fork until mostly combined.
  4. Using your hands, knead remaining dry ingredients into the dough until it is completely incorporated. (You will know the dough is complete when it feels kind of like play-dough.)
  5. After making the dough – tear the dough into golf ball sized pieces, flatten with your hands and dust with a little millet or quinoa flour to limit the stickiness.
  6. Use either a pasta maker or a rolling pin to roll the dough into thin sheets. Roll each piece as thin as you can before it starts to tear.
  7. After rolling the dough out, use either a knife (or a pizza cutter) or the fettuccine setting on the pasta machine to cut each piece into ribbons of pasta.
  8. Toss the cut pasta with a little flour so that it won’t stick together when you are ready to cook it. Always cook pasta in a large pot with plenty of salted boiling water. You want the pasta to be able to roll around freely and not stick to itself. Salt the water until it tastes like sea water. That gives your pasta extra flavor! This pasta is done cooking very quickly so you want to check it after it’s been cooking for just a few minutes. You don’t want it to be over cooked because it will just turn to mush. When done, drain it and add a little olive oil to prevent it from sticking.

To top the pasta I made two different sauces. The red sauce was made with canned grape tomatoes, tomato paste, sauteed garlic and onions, white wine, spinach, diced zucchini and sea salt. Delish 🙂 I also made a seafood sauce that used two cans each of Trader Joe’s crab and shrimp (including the juices), lots of butter with sauteed garlic, onions, leeks and mushrooms, as well as white wine and sea salt. At the very end I added half a pint of heavy cream and kept it on the heat just long enough to get hot.

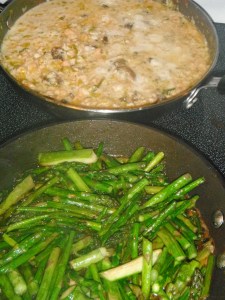
Even Hannah liked this sauce and she doesn’t like seafood! We also sauteed some asparagus in butter and salt and ate that on the side.

All in all it was a great evening, especially because we were able to Skype with the family and get a tour of the new house!

I wonder what we’re having for dinner next week?

Savory Gluten-Free Rolls

In the oven RIGHT NOW are some yummy gluten-free rolls! I never thought I would be putting the words “yummy” and “gluten-free” in the same sentence – but I’m pretty sure I’ve only had bad gluten-free bread in the past. I’m a believer now! These rolls have sold me – and they are sooo easy to make.

Savory Gluten-Free Rolls

  • Servings: 1 dozen rolls
  • Difficulty: intermediate
  • Print
Ingredients

  • 1 1/2 c warm water (almost as warm as you can stand to hold your finger in for about 20 seconds)
  • 1 tsp granulated sweetener
  • 2 1/4 tsp active dry yeast (one package)
  • 3 Tbsp agave nectar
  • 3 Tbsp olive oil
  • 1 Tbsp  raw apple cider vinegar (any other plain vinegar works in a pinch)
  • 1 c sorghum flour
  • 1/2 c brown rice flour
  • 1/2 c teff flour
  • 1/2 c arrowroot flour
  • 1/2 c tapioca flour
  • 1 1/2 tsp xanthan gum
  • 1 tsp sea salt
  • 1/2 tsp baking soda
  • 1/4 c chopped fresh garlic
  • 2-3 Tbsp Italian seasoning or 1 Tbsp each basil and oregano

Directions

  1. Preheat oven to 375.
  2. Oil a 12-cup muffin tin. Find a warm place to proof the rolls (the oven set at about 200 works, as does a food dehydrator set at the same temp.)
  3. Stir the warm water, sugar and yeast together in a small bowl. Set aside while you mix together the dry ingredients.
  4. In a large bowl, combine all of the dry ingredients (leaving out the chopped garlic). Whisk together to completely combine.
  5. To the small bowl with the liquids – add the agave syrup, olive oil, and vinegar. Stir well to combine.
  6. Pour the wet ingredients over the dry ingredients and quickly whisk together. Continue to whisk to get rid of any lumps and keep whisking until the batter thickens and becomes smooth.
  7. Quickly add the chopped garlic and stir until just combined. (Work quickly after all the ingredients have been added together, otherwise you might loose the little air bubbles that are being created by the baking soda and the vinegar.)
  8. Spoon mixture into the oiled muffin tin. Set in a warm place to rise for about 20 minutes.
  9. Bake in a preheated oven for 20-25 minutes (or until the tops are golden brown). Remove from oven.
  10. Allow rolls to cool for a few minutes before removing from pan (a knife may need to be run around the edge of each roll to loosen.)

Enjoy with butter, soup, or salad; or make each roll into a little mini sandwich!

Let me know what you think of these rolls! I just love them.

Raw Chocolate Torte

This is something you have to try to believe! Containing only raw ingredients and absolutely no dairy, soy or gluten – this is a dessert that can be enjoyed by nearly everyone (even those who are extremely restricted by their diets). Let me know what you think!

*Not my own recipe but I’m not sure where it’s from originally. If you know I would love to give credit where credit is due!*

Raw Chocolate Torte

  • Servings: 6-8
  • Difficulty: intermediate
  • Print
Crust:

  • 2 c pecans (or pretty much any other nut combo you can think of)
  • 8-10 medjool dates – pitted
  • 1 T coconut oil
  • 1 T cinnamon
  • 1 pinch ground cardamom

In a food processor, grind the nuts until they are fairly well blended. Add the rest of the crust ingredients and process until well combined. Press into a deep dish pie plate and refrigerate while you make the filling.

Filling:

  • 1 c raw cashew butter
  • 1 small avocado (yes – I said avocado)
  • 1/2 c + 2 T raw cocoa powder
  • 1/2 c agave nectar
  • 1/2 c melted coconut butter
  • 1/4 c water
  • 1 T vanilla

Rinse out the food processor. In the food processor, blend all filling ingredients until smooth. Scrape filling into crust and chill for 3-4 hours.

This is torte great on its own or served with berries! Enjoy!


Cilantro Dip

This. Dip. Is. Amazing. You will never want to use ranch again! Tzatziki sauce either. It’s great with veggies, all kinds of meat, over rice, with chips… pretty much anything you can think of. And if you just add some vinegar it would make a wonderfully creamy salad dressing. You will be eating this by the spoonful and licking the bowl (both of which have been done)!

I made this dip for the first time this weekend, in a gigantic sized batch. This recipe should give you similar results on a smaller scale!

*Please note that this dip is best if made at least one day before serving. The first time I made it I kept adding lime juice and salt, trying to get it to taste like something other than mayo. I put it in the fridge without really being happy with the flavor – but the next day it was wonderful!

Creamy Cilantro Dip/Dressing

Ingredients

  • 1/2 c mayonnaise
  • 1/4 c sour cream
  • 1 tsp lemon juice
  • 2 tsp lime juice
  • 1-2 garlic cloves – minced
  • 6 T chopped fresh cilantro (you can never have to0 much cilantro, so feel free to add more than this)
  • salt and pepper to taste

Instructions

  1. Combine all ingredients in a medium bowl and mix well.
  2. Taste and adjust the lime juice and salt if needed.
  3. Refrigerate over night if able.
  4. Allow dip to become your new addiction!

Serve with anything savory. I mean ANYTHING.

Creamy Italian Chicken on Rice

I love this dish! It’s simple to make and will easily feed a lot of people. This meal is almost as good as Mac n’ Cheese in the comfort-food-department. Although I’ve made this dish dozens of times – I apparently never took a picture of it.

Creamy Italian Chicken on Rice

  • Servings: 6-8
  • Difficulty: easy
  • Print
Ingredients

  • 3-4 c dry rice
  • 6-8 c water
  • boneless, skinless chicken pieces – 8-10oz per person
  • 1 medium onion – diced
  • 1 tsp dried oregano
  • 2 tsp dried basil
  • 3-4 tsp granulated garlic
  • 1-2 tsp paprika
  • 2-3 tsp salt
  • 1-2 tsp pepper
  • 1 – 26oz can Cream of Mushroom soup
  • 16 oz sour cream

Instructions

  1. Begin by cooking the rice. Combine the dry rice and water (1:2 ration) in a medium sauce pan and bring to a boil.
  2. Reduce rice to a simmer and cover. Cook until rice is tender and all of the water has been absorbed. Remove from heat.
  3. While rice is cooking, prepare the chicken.
  4. Preheat the oven to 350.
  5. Cut the chicken into bite size pieces and spread evenly in a greased oven proof pan. (Pan should not be full because you will be adding sauce ingredients.)
  6. Sprinkle chicken evenly with dried seasonings.
  7. Spread the Cream of Mushroom soup evenly to cover the chicken.
  8. Cover with foil to prevent browning and bake at 350 until the chicken is cooked through.
  9. When cooked, remove from the oven and stir in the sour cream to create a smooth creamy sauce.
  10. Taste and adjust seasoning if needed.
  11. Reheat for a few minutes if needed.

Serve over cooked rice with lots of extra sauce! Can be served with steamed veggies or a big green salad.

Notes:

  1. The rice instructions written here are for short grained white rice. Adjust amounts as needed if another kind of rice is used.
  2. The rice and the sauce can help this dish easily stretch to feed more people.
  3. Veggies such as zucchini, red bell peppers, broccoli, etc. can easily be added to the chicken if desired.
  4. This dish can be frozen and then reheated BEFORE the sour cream is added.
  5. This recipe can be gluten free if a gluten free Cream of Mushroom soup is used.

Fish Sauce

From Nourishing Traditions by Sally Fallon – on fish sauce in soup

“Another excellent addition to soup is fish sauce. You can make this yourself (see below), or buy a Thai or Vietnamese variety (called nam pla or nuoc mam). These clear brown fermented sauces, made from small whole fish including the head and organs, are rich in iodine and other substances that benefit the thyroid gland. On heating the fishy taste disappears but the nutrients remain. You may add fish sauce to any heated soup instead of salt.”

Fermented Fish Sauce – makes about 2 cups

1½ lbs small fish, including heads, cut up (sardines work well)

3 Tbsp sea salt

2 c. filtered water

2 cloves garlic, mashed

2 bay leaves, crumbled

1 tsp peppercorns

several pieces lemon rind

1 Tbsp tamarind paste (optional)

2 Tbsp whey

Toss fish pieces in salt and place in a wide-mouth, quart-sized mason jar. Press down with a wooden pounder or meat hammer. Mix remaining ingredients and pour over fish. Add additional water to cover fish thoroughly. The top of the liquid should be at least 1 inch below the top of the jar. Cover tightly and leave at room temperature for about three days. Transfer to refrigerator for several weeks. Drain liquid through a strainer and store fish sauce in the refrigerator.

Tony O Rama Bars and Job Hunting

Job hunting makes me SCREAM! I’m just tired of filling out applications with all of the same information that’s on my resume, chatting with people that “ooh” and “aw” over my resume, and then never getting a job.
So what do I do? After another afternoon of filling out applications and turning them in – I drove to the downtown Bellingham Co-Op and continue my search (and blog writing) with the wonderful help of a gluten free Tony O Rama Bar! I don’t know why they call it that – it’s a coop thing.
This bar is like nothing I’ve ever had! I haven’t attempted to duplicate the wonderfulness yet – but I will.
The ingredients are simple: chocolate chips, peanut butter, powdered sugar, vegan (blegh) butter, coconut, brown sugar. It’s pretty much this slab of peanut buttery, coconuty heaven with another slab of coconut chocolaty goodness on top! Words can not describe. And the great thing about this bar is NO GLUTEN! So other than that 1/4 pound of sugar I just inhaled – there’s no guilt! Not that I usually have any type of guilt when I’m eating – but since Hannah and I ate most of a huge loaf of bread on the way home from the store yesterday, I’m working on cutting back on the wheat today 🙂
So the lesson to be learned here is: if life hands you something frustrating – chocolate, coconut and peanut butter will fix it!